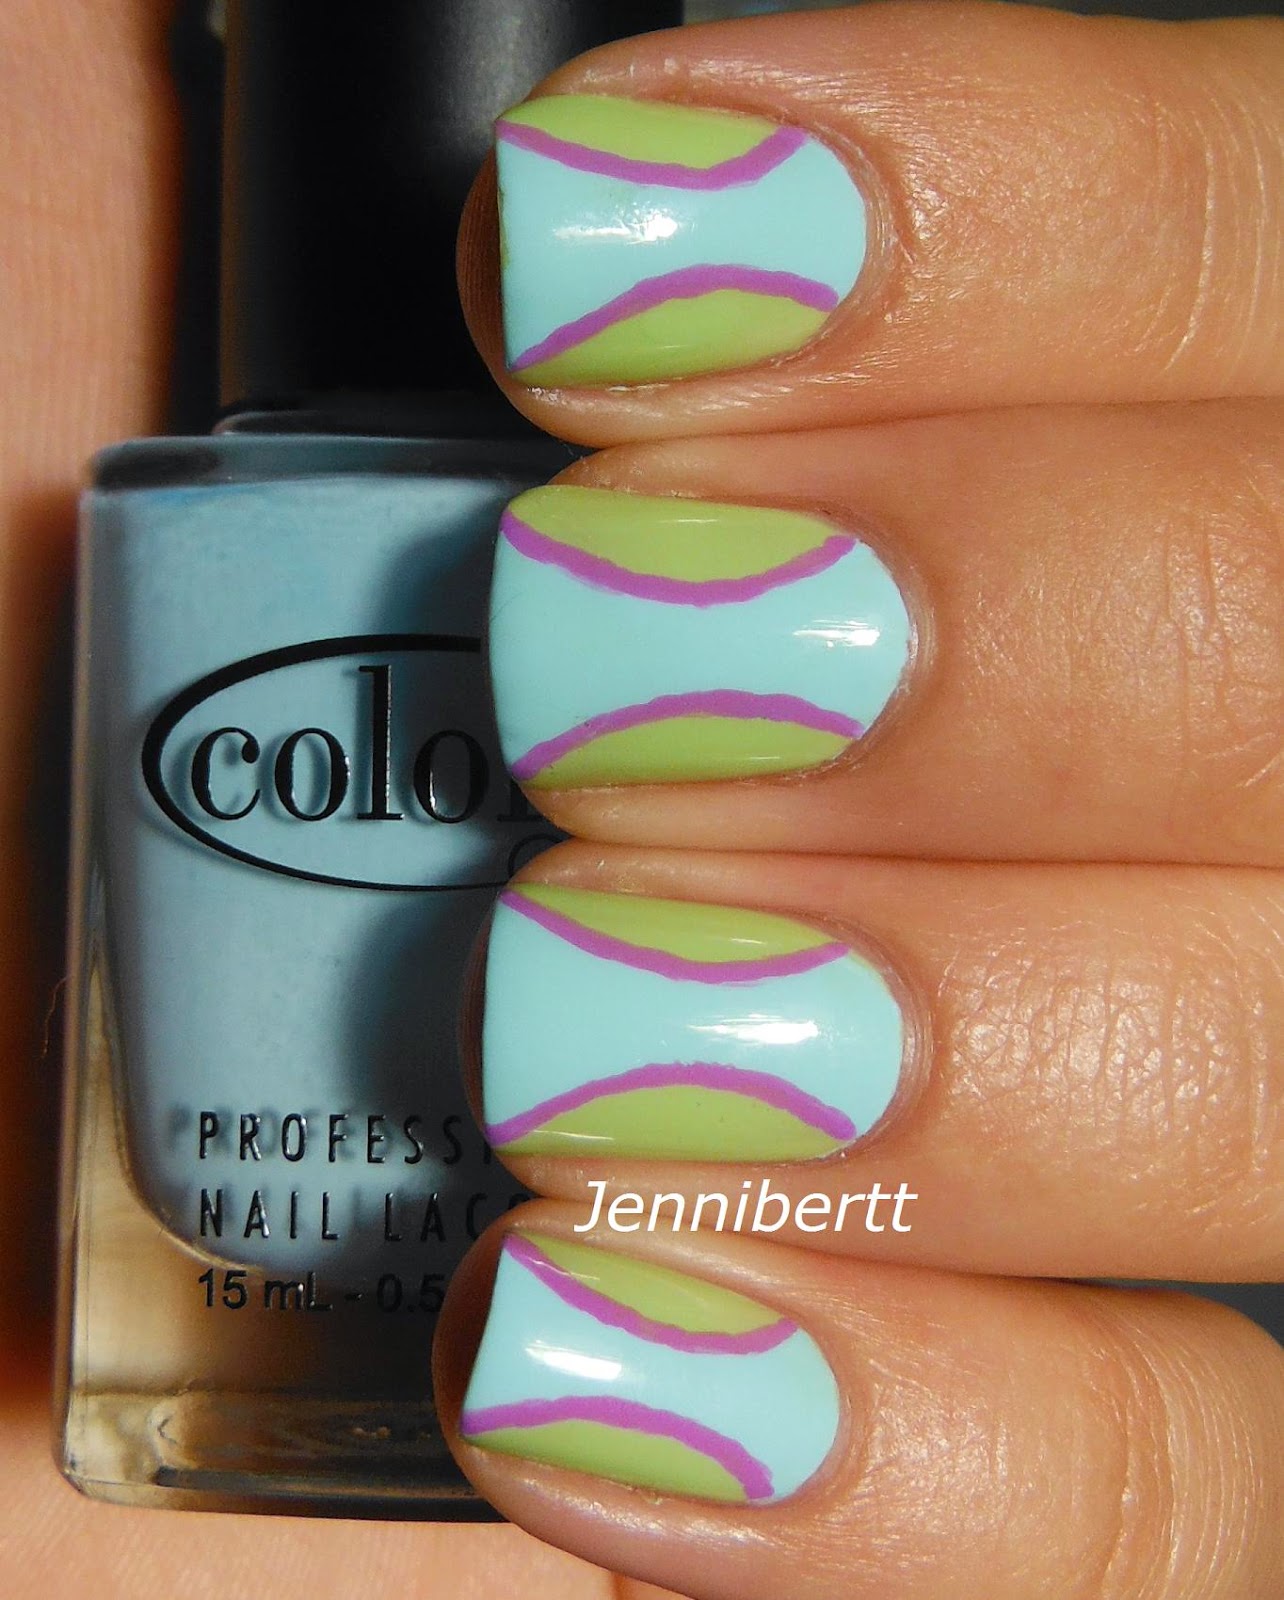
I saw My Simple Little Pleasures do this a few weeks ago, and of course had to try it. I haven't done anything rainbow in a while, so I did a rainbow version!
Pretty cool, huh?
I just used creme polishes, and as you can see, I have many more greens, blues, and purples than the warmer tones. So I just did the warm tones on one finger, and did the cool tones on the last three.
Here are the colors starting with the main base color, the bottom triangle and going from top to bottom, index to pinky. Hopefully that makes sense
China Glaze- Dance Baby (Electropop Collection Spring 2012)
Lime Crime- Crema de Limon
Zoya- Wendy (Tickled Collection Summer 2014)
OPI- Where Did Suzi's Mango? (Brazil Collection Summer 2014)
Zoya- Neely (Lovely Collection Spring 2013)
Orly- Green Apple
Illamasqua- Smash
OPI- Jade is the New Black
Color Club- Take Me to Your Chateau (Pardon My French Collection Spring 2010)
Zoya- Wednesday (Beach Collection Summer 2012)
Barry M- Guava (Gelly Hi-Shine Line)
Zoya- Ling (Tickled Collection Summer 2014)
Barry M- Prickly Pear (Gelly Hi-Shine Line)
Illamasqua- Jo'mina
China Glaze- What a Pansy (City Flourish Collection Spring 2014)
Anise- Violet Falls in Love
Showing posts with label Color Club. Show all posts
Wednesday, April 1, 2015
Thursday, September 11, 2014
Sideways Half Moons
I saw this design on Pinterest a few weeks ago and am finally getting around to trying it out. Everyone knows I love me some half moons because they are so easy, but this is a nice twist to it. I added a little of my own touch by outlining the lines:
As you can see, I need some practice with free handing straight clean lines! I was also going to add some horizontal lines over the blue, but the purple took so long and didn't turn out the way I wanted, so I just skipped those.
I started out with two coats of China Glaze- Be More Pacific (Off Shore Collection Summer 2014). Then I applied the half moon stickers and applied Color Club- Take Me To Your Chateau (Pardon My French Collection Summer 2010). I have fairly curved nails, so this technique wasn't ideal for my nails. No matter how much I pressed on the stickers to make sure it was flat on my nail, the color still managed to bleed so it wasn't a perfect line. So, I will probably not ever be doing this again, especially since my lines that I did to cover up the mess came out so crappy! The purple I used is Floss Gloss- Lean.
As you can see, I need some practice with free handing straight clean lines! I was also going to add some horizontal lines over the blue, but the purple took so long and didn't turn out the way I wanted, so I just skipped those.
I started out with two coats of China Glaze- Be More Pacific (Off Shore Collection Summer 2014). Then I applied the half moon stickers and applied Color Club- Take Me To Your Chateau (Pardon My French Collection Summer 2010). I have fairly curved nails, so this technique wasn't ideal for my nails. No matter how much I pressed on the stickers to make sure it was flat on my nail, the color still managed to bleed so it wasn't a perfect line. So, I will probably not ever be doing this again, especially since my lines that I did to cover up the mess came out so crappy! The purple I used is Floss Gloss- Lean.
Wednesday, April 16, 2014
Green Holographic Ombre
The last holographic ombre I did was using the not so holographic China Glaze holos released last year. I got some green holos in the mail recently and decided to do a green one. One of these isn't as holo as the others which kind of sucks. Another reason to put all my holos in one drawer because I totally have other greens of the shade that isn't as intense, that ARE intense like the others shown here:
Either way it still looks awesome!
Can we just take a second and die over that Jennifer Green Enchanted holo on my ring finger! Not only is it my first Enchanted that I finally managed to snag, BUT it is the most amazing Jennifer Green ever, probably my new favorite!!!
The colors from my index-pinky:
Colors by Llaroew- Gizzards & Lizards an amazing deep forest green
Nubar- Reclaim This is the not so holo one I was talking about. It is definitely holo, it just looks wimpy compared to the others!
Enchanted Polish- March 2014 AMAZING!!!
Color Club- Kismet
All were two easy coats. Gizzards & Lizards, and Reclaim are nearly one coaters though.
Lastly, the color used for the french tips is Color Club- Beyond
Either way it still looks awesome!
Can we just take a second and die over that Jennifer Green Enchanted holo on my ring finger! Not only is it my first Enchanted that I finally managed to snag, BUT it is the most amazing Jennifer Green ever, probably my new favorite!!!
The colors from my index-pinky:
Colors by Llaroew- Gizzards & Lizards an amazing deep forest green
Nubar- Reclaim This is the not so holo one I was talking about. It is definitely holo, it just looks wimpy compared to the others!
Enchanted Polish- March 2014 AMAZING!!!
Color Club- Kismet
All were two easy coats. Gizzards & Lizards, and Reclaim are nearly one coaters though.
Lastly, the color used for the french tips is Color Club- Beyond
Wednesday, April 2, 2014
Color Club + Water Marble
Like Orly, Color Club has decided to change their logos on their bottles. I am not too sure if they reformulated though. I went to my nail shop and they had this new display of all of the new Color Club collections in their new bottles. I saw a bunch of collections on Head2Toe Beauty a few weeks ago and have been searching for swatches, but nothing! Luckily they had swatches on nail wheels on the display which I am happy for because some of them were a little weird, like the Modern Mosaics...Anyways, here is the one polish I managed to get:
I must say I do like the new packaging/logo, and the cap has a nice rubber feel to it. As you can see, Color Club is also jumping on the indie like polish band wagon!
I aim to get at least one rainbow glitter in a milky white base from every brand that makes one. Just to find the best one, kind of like what I am doing with Jennifer Green polishes. This isn't my favorite rainbow polish in a milky base.... As you can see it has A LOT of purple glitters, there were like no greens either, so maybe it isn't aiming to be rainbow.
The color is Color Club- For You (Celebration Collection 2014). I used two coats. The formula was really good. I kind of had to play around with glitter placement on the first coat, but the second coat was much easier since the glitter had a base to grab onto. The one thing I did not like was that the large glitters had a little curl to them, making them snag and pop off easily :(
The colors I used for the marble going from pink-purple:
Wet n Wild- Candy-Licious (Megalast Line)
OPI- Toucan Do It If You Try (Brazil Collection Spring 2014)
OPI- I Just Can't Cope-Acabana (OPI- Brazil Collection Spring 2014)
OPI- Green-Wich Village (Mod About Brights Collection 2008)
Wet n Wild- On A Trip (Megalast Line)
I must say I do like the new packaging/logo, and the cap has a nice rubber feel to it. As you can see, Color Club is also jumping on the indie like polish band wagon!
I aim to get at least one rainbow glitter in a milky white base from every brand that makes one. Just to find the best one, kind of like what I am doing with Jennifer Green polishes. This isn't my favorite rainbow polish in a milky base.... As you can see it has A LOT of purple glitters, there were like no greens either, so maybe it isn't aiming to be rainbow.
The color is Color Club- For You (Celebration Collection 2014). I used two coats. The formula was really good. I kind of had to play around with glitter placement on the first coat, but the second coat was much easier since the glitter had a base to grab onto. The one thing I did not like was that the large glitters had a little curl to them, making them snag and pop off easily :(
The colors I used for the marble going from pink-purple:
Wet n Wild- Candy-Licious (Megalast Line)
OPI- Toucan Do It If You Try (Brazil Collection Spring 2014)
OPI- I Just Can't Cope-Acabana (OPI- Brazil Collection Spring 2014)
OPI- Green-Wich Village (Mod About Brights Collection 2008)
Wet n Wild- On A Trip (Megalast Line)
Tuesday, March 11, 2014
Color Club- The Uptown
I almost didn't post this polish, but I got somewhat decent pictures and this polish is way too gorgeous not to share. I felt like this polish would have gotten a lot of love when it came out, but surprisingly no one went crazy. Probably because Color Club isn't the most accessible nail band out there? My polish shop has been really lagging on getting polish collections lately, and The Girl About Town of course never came in. Luckily I got this in my last swap! Here it is:
Sunlight
The last three were taken in the shade (kind of)
Two coats of Color Club- The Uptown (Girl About Town Collection Fall 2013) Layered over one coat of OPI- Sapphire in the Snow (Holiday Wishes Collection 2009)
This polish has so much flakies in it, it is ridiculous! It is really easy to work with, although the light purple shade is kind of sheer for my liking, so I went ahead and layered it over a complimentary color. The flakies in it look like a shift from red-orange-green, kind of like Essie Shine of the Times.
Next time I wear it I will definitely mattify it!
Lacquer of Leave Her has a great comparison post between this and the coveted Nfu Oh No 51. After looking at the comparison, I'd say I prefer the Color Club, but I will always keep my Nfu Oh Boobie bottles.
Saturday, February 1, 2014
Ombre Dots
This is probably my most favorite nail art I have done, or at least one of my top 5. It is very simple, so anyone can do it! You just need a lot of polish...
Cool, huh?
I did something pretty similar before, but it was a rainbow. The Australian tuplets of instagram did it, so I played off that and did my own version.
Here are the colors from my index finger down to my pinky, a total of 12!
Zoya- Neely (Lovely Collection Spring 2013)
Jessica- Lime Cooler (Gelato Mio Collection Spring 2012)
China Glaze- Electric Pineapple (Island Escape Collection Summer 2011)
China Glaze- Def Defying (Cirque du Soleil Collection Winter 2012)
China Glaze- Gaga For Green (Electropop Collection Spring 2012)
China Glaze- Starboard (Anchors Away Collection Spring 2011)
OPI- Mermaid Tears (Pirates of the Caribbean Collection Spring 2011)
China Glaze- For Audrey
China Glaze- Electric Beat (Electropop Collection Spring 2012)
China Glaze- Flyin' High
OPI- Fly (Nikki Minaj Collection 2012)
Color Club- Endless Summer (Fiesta Collection Summer 2013)
I topped it off with Seche Vite so I wouldn't ruin the design with smearing!
Enjoy!
Cool, huh?
I did something pretty similar before, but it was a rainbow. The Australian tuplets of instagram did it, so I played off that and did my own version.
Here are the colors from my index finger down to my pinky, a total of 12!
Zoya- Neely (Lovely Collection Spring 2013)
Jessica- Lime Cooler (Gelato Mio Collection Spring 2012)
China Glaze- Electric Pineapple (Island Escape Collection Summer 2011)
China Glaze- Def Defying (Cirque du Soleil Collection Winter 2012)
China Glaze- Gaga For Green (Electropop Collection Spring 2012)
China Glaze- Starboard (Anchors Away Collection Spring 2011)
OPI- Mermaid Tears (Pirates of the Caribbean Collection Spring 2011)
China Glaze- For Audrey
China Glaze- Electric Beat (Electropop Collection Spring 2012)
China Glaze- Flyin' High
OPI- Fly (Nikki Minaj Collection 2012)
Color Club- Endless Summer (Fiesta Collection Summer 2013)
I topped it off with Seche Vite so I wouldn't ruin the design with smearing!
Enjoy!
Friday, January 24, 2014
San Francisco 49er Nail Art
I have never have been a fan of football, but my boyfriend loves it. So, of course I will support the team he likes, especially since they kicked butt again this year and nearly made it to the Superbowl for the 2nd year in a row... Here is what I did, nothing too fancy:
For those of you who don't know, the 49er's colors are red and gold.
I couldn't decide if I wanted silver or black as the base, so I did both without realizing that they are Raider's colors. Oh well.
The silver is Urban Outfitters- Silver Holo and the black is Color Club- Beyond (Halo Hues Collection 2013). Both were two coats.
Then, using the brush from the bottle, I started with the gold shade which is Cirque- Chrysopoeia (Alchemy Collection 2013). Then did the red which is Emily de Molly- Seeing Red
I really like this nail art, very easy, yet eye catching.
Monday, December 23, 2013
South Park Nails!
I mentioned earlier in the month that I would be recreating my South Park nails from last year. I still think this is my all time favorite, original, nail art design that I have done. I recreate a lot of designs that others have made up, but this was made up by me! There are definitely South Park nail art photos out there, but they all involve their face, I took the easy route :P I did it slightly different this year, but it is the same as last year for the most part:
Stan, Kyle, Cartman, and Kenny!
Stan: He is the only boy I used different colors for this year. Last year I had only one red, and it had shimmers in it, so this year he is a little more cohesive with the others! The red is China Glaze- Adventure Red-y (On Safari Collection Fall 2012). I applied that first, and then put the blue on top which is China Glaze- Man Hunt (On Safari Collection Fall 2012). It is a true blue, but came up much darker since I layered it over the red. I used the brush from the bottle for both colors, except I used a dotting tool for his little ball on his hat.
Kyle: I applied the lighter green with the brush from the bottle which is China Glaze- Gaga For Green (Electropop Collection Spring 2012). Then using the brush from the bottle again, I applied China Glaze- Starboard (Anchors Away Collection Spring 2011) to make the darker bill of his hat.
Cartman: Using the brush from the bottle again, I used China Glaze- Flyin' High (Up and Away Collection Spring 2012) for the blue part of his hat. Then I used China Glaze- Happy Go Lucky for the yellow parts, using the brush for the bottom part of his hat, and a dotting tool for the top part.
Kenny: Also using the brush from the bottle, I used OPI- On The Same Paige (Brights Collection 2009) for the orange part of his hat. Then using a tiny nail art brush for the brown on his hat, I used OPI- A-Taupe The Space Needle (Touring America Collection Fall 2011). I only got this brown specifically for this nail art! Probably the only time I will use it...
Lastly, the main difference with this is I applied a base color! I used Color Club- Take Me To Your Chateau (Pardon My French Collection Spring 2010). I used two coats. I thought this would be a good base since it is the perfect sky blue color, and they are always outside doing something...
Hope you enjoyed these!
Stan, Kyle, Cartman, and Kenny!
Stan: He is the only boy I used different colors for this year. Last year I had only one red, and it had shimmers in it, so this year he is a little more cohesive with the others! The red is China Glaze- Adventure Red-y (On Safari Collection Fall 2012). I applied that first, and then put the blue on top which is China Glaze- Man Hunt (On Safari Collection Fall 2012). It is a true blue, but came up much darker since I layered it over the red. I used the brush from the bottle for both colors, except I used a dotting tool for his little ball on his hat.
Kyle: I applied the lighter green with the brush from the bottle which is China Glaze- Gaga For Green (Electropop Collection Spring 2012). Then using the brush from the bottle again, I applied China Glaze- Starboard (Anchors Away Collection Spring 2011) to make the darker bill of his hat.
Cartman: Using the brush from the bottle again, I used China Glaze- Flyin' High (Up and Away Collection Spring 2012) for the blue part of his hat. Then I used China Glaze- Happy Go Lucky for the yellow parts, using the brush for the bottom part of his hat, and a dotting tool for the top part.
Kenny: Also using the brush from the bottle, I used OPI- On The Same Paige (Brights Collection 2009) for the orange part of his hat. Then using a tiny nail art brush for the brown on his hat, I used OPI- A-Taupe The Space Needle (Touring America Collection Fall 2011). I only got this brown specifically for this nail art! Probably the only time I will use it...
Lastly, the main difference with this is I applied a base color! I used Color Club- Take Me To Your Chateau (Pardon My French Collection Spring 2010). I used two coats. I thought this would be a good base since it is the perfect sky blue color, and they are always outside doing something...
Hope you enjoyed these!
Sunday, December 15, 2013
More Textured Half Moons
I have said it once, and I will say it again: Textured polishes are the best for half moon nail art! They are for the most part really thick which is what you need in a polish for doing half moons, plus the different textures make them look that much more awesome! This one isn't very winter-esque, but I don't care!
This is also the first time I have used a holo as the base color! Me likey.
Let's start off with the green nails: The holo is Color Club- Kismet (Halo Hues Collection 2013). Probably my favorite of the color club holographics, since it is green obviously. I used two coats, but you can get away with one thick coat if you want. The green textured polish is Kiko- Spring Green 643 (Sugar Mat Collection 2013). The first time I saw this polish was on My Polish Stash. I died. Kiko released a lot of amazing textured polish, but of course we American's can't get them that easily. Luckily my nail mail buddy had connections in Europe, and I got this beauty! It is amazing. I wish there were more green textures out there
The purple and pink nails: The holo base is Emily de Molly- Peer Pressure, I used two coats. I first show cased this polish here. Seriously the best pink out there! The textured purple is a polish I am really surprised I haven't heard much about. I don't even think I have seen it on any main stream blogger's blogs. The polish is OPI- My Current Crush (The Texture Effect LE Duo). This polish also came with a OPI base coat. I first saw this at ULTA and I am sure my jaw literally dropped. I wanted to get it since there were only 3 on the shelf, but I stopped myself and luckily when my boyfriend took me on my nail polish shopping spree, this was at my nail supply store! I actually didn't get that good of a deal since it is $10, and my shop had it for $9. Oh well
I hope you enjoyed these! And you will probably be seeing some more of these in the future :P
This is also the first time I have used a holo as the base color! Me likey.
Let's start off with the green nails: The holo is Color Club- Kismet (Halo Hues Collection 2013). Probably my favorite of the color club holographics, since it is green obviously. I used two coats, but you can get away with one thick coat if you want. The green textured polish is Kiko- Spring Green 643 (Sugar Mat Collection 2013). The first time I saw this polish was on My Polish Stash. I died. Kiko released a lot of amazing textured polish, but of course we American's can't get them that easily. Luckily my nail mail buddy had connections in Europe, and I got this beauty! It is amazing. I wish there were more green textures out there
The purple and pink nails: The holo base is Emily de Molly- Peer Pressure, I used two coats. I first show cased this polish here. Seriously the best pink out there! The textured purple is a polish I am really surprised I haven't heard much about. I don't even think I have seen it on any main stream blogger's blogs. The polish is OPI- My Current Crush (The Texture Effect LE Duo). This polish also came with a OPI base coat. I first saw this at ULTA and I am sure my jaw literally dropped. I wanted to get it since there were only 3 on the shelf, but I stopped myself and luckily when my boyfriend took me on my nail polish shopping spree, this was at my nail supply store! I actually didn't get that good of a deal since it is $10, and my shop had it for $9. Oh well
I hope you enjoyed these! And you will probably be seeing some more of these in the future :P
Wednesday, August 28, 2013
Holographic Fish Tail French Tips
I am combining some of my favorite "techniques" into one again. I love me some french tips and holographic polishes, so I used both to do the french tip fish tail technique. I have seen these around for a while, and I am not too sure what the official name of the technique is So, I am just calling it a fishtail french tip since it is pretty much the fishtail technique, but only on the tips! Here they are:
ksfbkjwebfkjwbegkjsbg!
Two of these polishes are Australian indie brands. These Aussie girls are seriously amazing. I need to go there again for a few weeks and just buy all the Australian polish!
I started off with two coats of Emily de Molly- Peer Pressure. The most awesome bubble gum pink holo ever!! Hayley, the creator makes some of the most amazing polishes, I don't know how she does it. She just released some new shades too that I am just dying to get! I luckily snagged this when Llarowe restocked with their new cart hold feature. Along with this red.
The purple is Color Club- Eternal Beauty (Halo Hues Spring 2013). This used to be my favorite holo since it was one of the first unique holo shades in my collection, and very affordable compared to most. But as long as these indie brands keep making new unique shades, I have a feeling this one will be pushed to the side :(
Lastly, the darker purple shade is Lilypad Lacquer- True Blood. I guess it is more of a blood shade. And SUPER opaque. Just ridiculous. I need to wear it on its own eventually.
Blurry shot to really show how strong the holo is...
For you Aussie ladies, you can get every Emily de Molly polish possible on her Etsy or Big cartel. for everyone else, they are available at Llarowe (always sold out), meimeisignatures, Norwaynails, and Sallymagpies
Lilypad Lacquer actually ships worldwide! You can get them on Etsy, there is seriously every color to choose from. I don't remember how much shipping was, but you can also get them on Llarowe.
And you can get Color Club from head2toebeauty
ksfbkjwebfkjwbegkjsbg!
Two of these polishes are Australian indie brands. These Aussie girls are seriously amazing. I need to go there again for a few weeks and just buy all the Australian polish!
I started off with two coats of Emily de Molly- Peer Pressure. The most awesome bubble gum pink holo ever!! Hayley, the creator makes some of the most amazing polishes, I don't know how she does it. She just released some new shades too that I am just dying to get! I luckily snagged this when Llarowe restocked with their new cart hold feature. Along with this red.
The purple is Color Club- Eternal Beauty (Halo Hues Spring 2013). This used to be my favorite holo since it was one of the first unique holo shades in my collection, and very affordable compared to most. But as long as these indie brands keep making new unique shades, I have a feeling this one will be pushed to the side :(
Lastly, the darker purple shade is Lilypad Lacquer- True Blood. I guess it is more of a blood shade. And SUPER opaque. Just ridiculous. I need to wear it on its own eventually.
Blurry shot to really show how strong the holo is...
For you Aussie ladies, you can get every Emily de Molly polish possible on her Etsy or Big cartel. for everyone else, they are available at Llarowe (always sold out), meimeisignatures, Norwaynails, and Sallymagpies
Lilypad Lacquer actually ships worldwide! You can get them on Etsy, there is seriously every color to choose from. I don't remember how much shipping was, but you can also get them on Llarowe.
And you can get Color Club from head2toebeauty
Wednesday, August 21, 2013
Rainbow Holographic Half Moons
I am going to keep this short and sweet. Everyone knows I love rainbow nails and half moons, but today is the first time I combined them! Here it is:
The colors I used from red to purple: Emily de Molly- Seeing Red, Hits- Demeter, Naild' It Unique Polish- Glowber, Color Club- Over The Moon, and Emily de Molly- Devotion.
Then using a dotting tool, I used Color Club- Beyond to make the dots to make the half moon shape. Hope you enjoyed these!
The colors I used from red to purple: Emily de Molly- Seeing Red, Hits- Demeter, Naild' It Unique Polish- Glowber, Color Club- Over The Moon, and Emily de Molly- Devotion.
Then using a dotting tool, I used Color Club- Beyond to make the dots to make the half moon shape. Hope you enjoyed these!
Saturday, August 3, 2013
Nail Art for the first ever International Nail Art Day!
I got an email from Nailgasm, the first ever nail art documentry, that today is officially International Nail Art Day. I assume pretty much every nail blogger will be contributing, so of course I am going to as well! I originally wanted to do a marble of course, but I thought I should try a new technique. Thenailasaurus has been posting all these different Waterfall looks, so I decided on that. Here is how it turned out:
I think I did alright for my first time...
I started out with one coat of Mod Lacquer- Dreamland, one of my favorite indie brands. I used two thickish coats. It is the prettiest mid tone purple with a scattered holographic finish!
The three colors I used for the waterfall affect were Essie- Butler Please, Anise- Violet Falls In Love, and Color Club- Revvvolution. I ended up doing some stripes with all three colors, then went in with one of each and filled in the spaces. I probably should have used like 5 colors so it wouldn't look as muted. But over all, I like it! And I will definitely try it again.
What did you do for International Nail Art Day?
I think I did alright for my first time...
I started out with one coat of Mod Lacquer- Dreamland, one of my favorite indie brands. I used two thickish coats. It is the prettiest mid tone purple with a scattered holographic finish!
The three colors I used for the waterfall affect were Essie- Butler Please, Anise- Violet Falls In Love, and Color Club- Revvvolution. I ended up doing some stripes with all three colors, then went in with one of each and filled in the spaces. I probably should have used like 5 colors so it wouldn't look as muted. But over all, I like it! And I will definitely try it again.
What did you do for International Nail Art Day?
Thursday, August 1, 2013
Spongeless Gradient Nail Art
One of my favorite types of nail art is glitter gradients, but I still haven't mastered sponging normal polishes to a nice gradient. I saw this spongeless gradient using a jelly polish on Chalkboard Nails and knew I had to try it! I even took her advice by topping it with the same glitter:
It was definitely a success!
I started off with two coats of Color Club- Sunrise Canyon (Fiesta Collection Spring 2013), which is just a standard creme polish. Then doing what Reccca Likes Nails showed in her tutorial, I just used the brush from the bottle of a jelly polish to gradually create the gradient. The jelly I chose was China Glaze- Keepin' It Teal (Sunsational Collection Summer 2013). I added about 4 coats of that total, with the most toward the tips. Lastly, I topped it off with Maybelline Color Show- Clearly Spotted to hide any imperfections.
I must say, it looks uhmayzing! Although it was kind of time consuming compared to doing it all at once using a sponge. I am a little slower doing my nails anyways. It was kind of frustrating to get the technique down, that is what the non photo hand is for! Even after I felt I was done, I didn't like it because it didn't look smooth enough for my taste, but once you add that glitter topper, bam! It all came together!
I will definitely be doing more of these!
It was definitely a success!
I started off with two coats of Color Club- Sunrise Canyon (Fiesta Collection Spring 2013), which is just a standard creme polish. Then doing what Reccca Likes Nails showed in her tutorial, I just used the brush from the bottle of a jelly polish to gradually create the gradient. The jelly I chose was China Glaze- Keepin' It Teal (Sunsational Collection Summer 2013). I added about 4 coats of that total, with the most toward the tips. Lastly, I topped it off with Maybelline Color Show- Clearly Spotted to hide any imperfections.
I must say, it looks uhmayzing! Although it was kind of time consuming compared to doing it all at once using a sponge. I am a little slower doing my nails anyways. It was kind of frustrating to get the technique down, that is what the non photo hand is for! Even after I felt I was done, I didn't like it because it didn't look smooth enough for my taste, but once you add that glitter topper, bam! It all came together!
I will definitely be doing more of these!
Wednesday, June 19, 2013
Another Simple Swatch + Water Marble Using My Last Unused Gloss 'n Sparkle
Hold on to your seats and prepare for rainbow over load. I probably should have saved these to wear for SF Pride!
Gloss 'n Sparkle- Unicorn Droppings
I mainly wanted this polish for the name... But it is seriously amazing. Anything rainbow is an A in my book.
Unicorn droppings is a white creme base with a lot of tiny sparkles, but of course the sparkles aren't noticeable in the pictures! It has large glitters in pretty much every color of the rainbow. It is jam packed of glitter too, no problem with getting it on the brush. But I did kind of have to move the glitters around evenly on my nail. The less brush strokes you use, the better!
On to the marble. This is probably the most proud I have been over a water marble I have done. I used 6 colors which is insane, and I managed to get pretty much all of the colors on my nail, aside from the very tiny bit of green on my tip! But hey, that is still six colors which is really hard!
The colors I used are: China Glaze- Adventure Red-y (On Safari Collection Fall 2012), OPI- On The Same Paige (Summer Brights Collection 2009), OPI- Need Sunglasses?, OPI- Green-wich Village (Mod About Brights Collection 2008), Color Club- Endless Summer (Fiesta Collection Summer 2013), and Anise- Violet Falls In Love. I had no problem with any of these polishes!
Gloss 'n Sparkle- Unicorn Droppings
I mainly wanted this polish for the name... But it is seriously amazing. Anything rainbow is an A in my book.
Unicorn droppings is a white creme base with a lot of tiny sparkles, but of course the sparkles aren't noticeable in the pictures! It has large glitters in pretty much every color of the rainbow. It is jam packed of glitter too, no problem with getting it on the brush. But I did kind of have to move the glitters around evenly on my nail. The less brush strokes you use, the better!
On to the marble. This is probably the most proud I have been over a water marble I have done. I used 6 colors which is insane, and I managed to get pretty much all of the colors on my nail, aside from the very tiny bit of green on my tip! But hey, that is still six colors which is really hard!
The colors I used are: China Glaze- Adventure Red-y (On Safari Collection Fall 2012), OPI- On The Same Paige (Summer Brights Collection 2009), OPI- Need Sunglasses?, OPI- Green-wich Village (Mod About Brights Collection 2008), Color Club- Endless Summer (Fiesta Collection Summer 2013), and Anise- Violet Falls In Love. I had no problem with any of these polishes!
Thursday, June 13, 2013
Simple Swatch: Trelly's Misc Polish
I believe this is fairly new brand, and people are already going nuts. This is from Trelly's Summer collection of amazing glitter toppers and crelly's with glitter. I got this and one of the crelly's, so far, I am impressed! Here it is:
Trelly's Misc Polish- Dreaming of Unicorns
The name also helps with the polishes awesomeness as well, although my bottle is labeled "Barbie Dream House" Trelly had a woopsy daisy. I ain't complaining though.
The polishes I layered it over are two coats of China Glaze- Sweet Hook (pink), and Color Club- Take Me to Your Chateau (Pardon My French Collection 2010).
Then I applied a pretty generous coat of Dreaming of Unicorns. The hearts came out no problem, but I had to fish for the other bigger glitters like the stars and circles. But that is always expected with oddly shaped glitters like that. It mainly consists of irridescent glitters of every shape and size, even squares! The only solid colored glitters are the big circle, star, and heart glitters, and medium hexagonals. The base is a tad bit on the thick side, but some polish thinner can fix that. The best part is that you get plenty of glitter on the brush!
You can purchase Trelly Polish on Etsy. Her summer collection is out of stock, but she will be restocking on Monday, along with some new amazing colors!
Trelly's Misc Polish- Dreaming of Unicorns
The name also helps with the polishes awesomeness as well, although my bottle is labeled "Barbie Dream House" Trelly had a woopsy daisy. I ain't complaining though.
The polishes I layered it over are two coats of China Glaze- Sweet Hook (pink), and Color Club- Take Me to Your Chateau (Pardon My French Collection 2010).
Then I applied a pretty generous coat of Dreaming of Unicorns. The hearts came out no problem, but I had to fish for the other bigger glitters like the stars and circles. But that is always expected with oddly shaped glitters like that. It mainly consists of irridescent glitters of every shape and size, even squares! The only solid colored glitters are the big circle, star, and heart glitters, and medium hexagonals. The base is a tad bit on the thick side, but some polish thinner can fix that. The best part is that you get plenty of glitter on the brush!
You can purchase Trelly Polish on Etsy. Her summer collection is out of stock, but she will be restocking on Monday, along with some new amazing colors!
Wednesday, June 12, 2013
Holographic Nail Art
I don't use holographic polishes for nail art very much. So I am trying to continue mastering stripes, and used holographic polishes this time!
Drooooool
The green is China Glaze- L8R G8R (OMG Collection 2009). The pink is Color Club- Halo-Graphic (Halo Hues 2013). The teal is Emily De Molly- Amazonia. Lastly, the Purple is Emily De Molly- Devotion.
I really enjoy the pattern I came up with as well. I started out by mapping out the pattern with a gel pen, and then painted two coats of each color as close to the line as possible. After those were dry, I used a really skinny nail art brush and painted two coats of Color Club- Beyond (Halo Hues 2013).
Hope you liked these!
The green is China Glaze- L8R G8R (OMG Collection 2009). The pink is Color Club- Halo-Graphic (Halo Hues 2013). The teal is Emily De Molly- Amazonia. Lastly, the Purple is Emily De Molly- Devotion.
I really enjoy the pattern I came up with as well. I started out by mapping out the pattern with a gel pen, and then painted two coats of each color as close to the line as possible. After those were dry, I used a really skinny nail art brush and painted two coats of Color Club- Beyond (Halo Hues 2013).
Hope you liked these!
Saturday, June 8, 2013
Rainbow Stripes
I am still trying to master stripes! They are so freakin hard. Maybe I should just try tape... Here is what I came up with:
As I have mentioned before, I will never get tired of rainbow nails!
I just used the brush from the bottle, and simply painted half of each nail.
The colors I used are: Index finger: Sally Hansen- Fuchsia Power, and Jessica- Tangerine Dreamz (Gilato Mio Collection Spring 2012).
Middle finger: Jessica- Banana Peel (Gilato Mio Collection Spring 2012), and Finger Paints- Sexy Sundress.
Ring finger: Essie- First Timer (Resort Collection 2013), and OPI- Fly (Nicki Minaj Spring 2012).
Pinky finger: Color Club- Endless Summer (Fiesta Collection Summer 2013), and Essie- Play Date (Go Overboard Collection 2012).
After the polish dried I just used Orly Instant Artist- Crisp White to do the stripes! I definitely need to work on them more... But either way I love how they turned out.
As I have mentioned before, I will never get tired of rainbow nails!
I just used the brush from the bottle, and simply painted half of each nail.
The colors I used are: Index finger: Sally Hansen- Fuchsia Power, and Jessica- Tangerine Dreamz (Gilato Mio Collection Spring 2012).
Middle finger: Jessica- Banana Peel (Gilato Mio Collection Spring 2012), and Finger Paints- Sexy Sundress.
Ring finger: Essie- First Timer (Resort Collection 2013), and OPI- Fly (Nicki Minaj Spring 2012).
Pinky finger: Color Club- Endless Summer (Fiesta Collection Summer 2013), and Essie- Play Date (Go Overboard Collection 2012).
After the polish dried I just used Orly Instant Artist- Crisp White to do the stripes! I definitely need to work on them more... But either way I love how they turned out.
Wednesday, May 1, 2013
Finally, another Water Marble! (fail)
I meant to post these yesterday so I would have 13 posts for April, falling short of my goal for 20 posts. Oh well, school is over in like 4 weeks, so that will give me a lot more time! Well, I had some time to do a marble, and this one gave me a lot of trouble. The polishes I used spread on the water perfectly, so I thought it was going to be an amazing one. But! Every time i dipped my finger where I thought it would look the best, it kept coming out all muddy...Here it is:
Oh yeah, and air bubbles galore!
I am actually pretty happy with the middle finger, the rest, not so much. I started out with a base coat of OPI- My Boyfriend Scales Walls (Spider man Collection 2012). The three colors I used were China Glaze- Sunday Funday (Avant Garden Collection 2013), Essie- First Timer (Resort Collection 2013), and Color Club- Sunrise Canyon (Fiesta Collection 2013).
I really recommend Essie polishes for marbling. They are great!
I will also show you the first finger (my thumb) that I did. It came out the best, and was all the rage on instagram. I normally don't show my thumb since it is usally a weird length compared to my other nails, but it came out so perfect!
Oh yeah, and air bubbles galore!
I am actually pretty happy with the middle finger, the rest, not so much. I started out with a base coat of OPI- My Boyfriend Scales Walls (Spider man Collection 2012). The three colors I used were China Glaze- Sunday Funday (Avant Garden Collection 2013), Essie- First Timer (Resort Collection 2013), and Color Club- Sunrise Canyon (Fiesta Collection 2013).
I really recommend Essie polishes for marbling. They are great!
I will also show you the first finger (my thumb) that I did. It came out the best, and was all the rage on instagram. I normally don't show my thumb since it is usally a weird length compared to my other nails, but it came out so perfect!
If only they all came out like that...
Wednesday, April 3, 2013
Austism Awareness Month
I decided to jump on the band wagon with all the other lovely nail blogging ladies, and did some blue nails for Autism Awareness Month. I guess yesterday was the official day, but I know a lot of bloggers are going to stick with blue nails the entire month! Like my girl Christine at Nails at 2am. I might try to do more blue nails, like one a week, because I really don't do blue nails that often. Here is what I came up with:
Sunlight
Shade
A simple ombre
The colors I used going from thumb to pinky: Color Club- Take Me To Your Chateau (Pardon My French collection 2010), China Glaze- Electric Beat (Electropop Collection 2012), China Glaze- Flyin' High (Up & Away Collection 2010), Anise- Island Lover, and Color Club- Endless Summer (Fiesta Collection 2013).
I used two coats for each nail, all are cream finishes, except Endless Summer is a weird satin matte type finish. Definitely not my favorite type of finish, but the color is just stunning, and a top coat can make it look normal anyways! The color isn't showing up accurate, either. It looks a lot like Sally Hansen- Pacific Blue, but it is actually a lot deeper.
Lastly, I topped it off with Elevation Polish- Haba Xueshan which is from their new View From the Top Collection. I am not sure if it is limited edition, but I snatched it up quick. Mainly because the only black and white glitter I have has shiny micro glitters in it, which you can see HERE. Chalkboard nails also did it it so much justice with her swatches, I couldn't resist. What makes this polish really special is the pale blue circle glitters in it. The formula was awesome, no trouble getting glitter on my brush, although the circle glitters were kind of hard to get :(.
You can find Haba Xueshan HERE, but it is currently sold out.
Hope you enjoyed these!
Friday, February 15, 2013
Halo Hues Swatches Part 2 and Comparisons
As I promised yesterday, I have the second part of the Halo Hues collection. Prepare yourselves, this part is like 1000x better!
Subscribe to:
Posts (Atom)