Showing posts with label Spongless Gradient. Show all posts

Thursday, July 31, 2014

Another No sponge Gradient

I decided to try another one of these after my last post because I still had two China Glaze polishes from the same collection that I have not tried.


I couldn't quite decide what glitter to use on top. It looks really good on the pink, not so much the purple. It is Mod Lacquer- Technicolor Noise. One of my favorite glitters! It is a mixture of pink, green, and blue glitters in various shapes and sizes. Get it on Mod Lacquer's Etsy.

The two bases I started out with were both two coats. The purple is Lime Crime- Lavendairy. Seriously, these are some of the best polishes out there. They are a cool pastel, yet almost neon, and all the ones I have tried are nearly one coaters! I did two here just because. And for once they are in stock on Lime Crime's Website! The pink is Zoya- Kitridge (Zoya Tickled Collection Summer 2014). It is just your standard bubble gum pink shade.

The Jellies I used were both from the China Glaze Sunsational Collection from Summer 2013. The pink is China Glaze- Heat Index, and the purple is China Glaze- Are You Jelly? The pink was really easy to work with, but the purple is fairly opaque, so you can actually see my brush strokes on my index and pinky.

All in all I am happy with these. Have you tried the no sponge gradient technique?

Tuesday, July 22, 2014

Simple Swatch + No Sponge Gradient

I really haven't got the hang of sponge gradients, so I am just going to stick with the no sponge technique that Rebecca Likes Nails came up with last year. Unfortunately the base I used was a little too dark, so the gradient is not too noticeable...


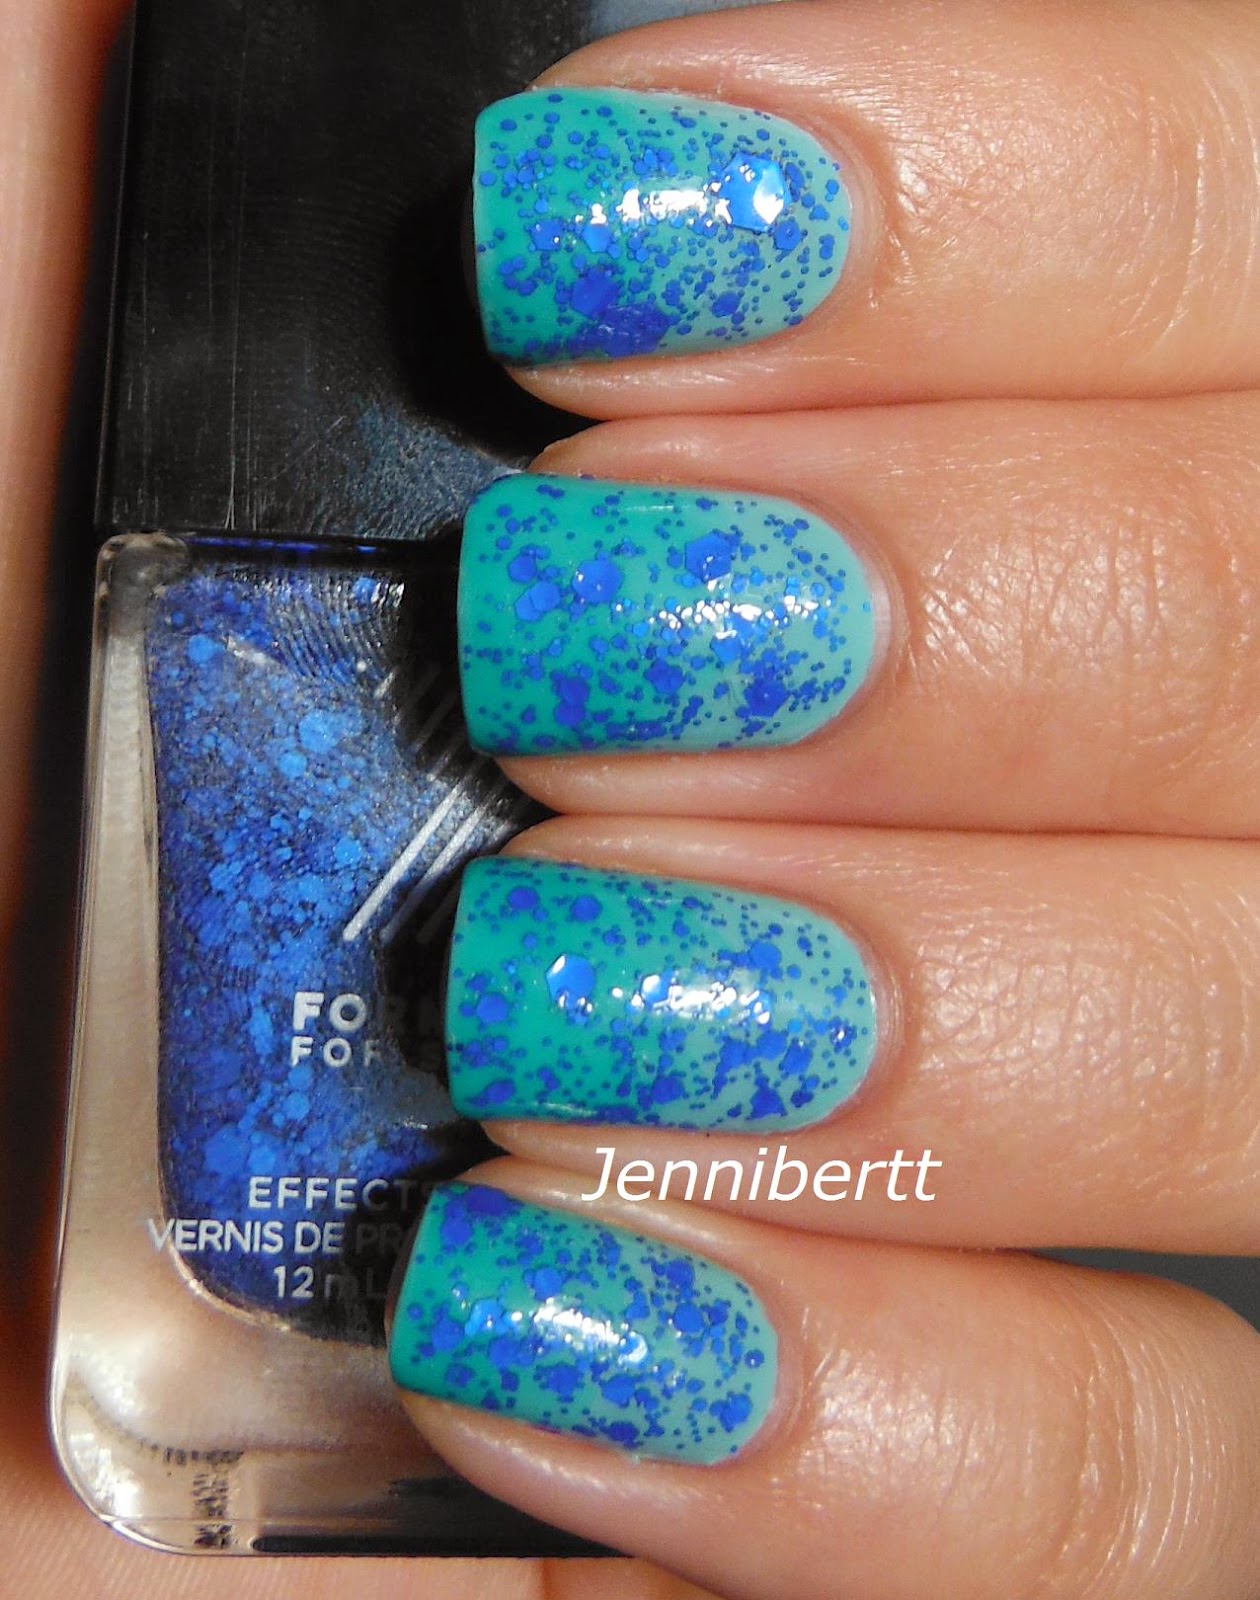
I started off with 2 coats of China Glaze- For Audrey, a classic. Then I used a little amount of polish to get the gradient effect by using China Glaze- Keepin' It Teal (Sunsational Collection Summer 2013). I did two layers of that.

Then I just applied the glitter, Sephora Formula X- TNT. Seriously phenomenal polish! I used one coat here which was perfect to cover my entire nail! Definitely a must have for any polish addict. 

Tuesday, August 27, 2013

Spongless Gradient Using (Mostly) Ausralian Brands

I tackled another spongless gradient using only untried polishes! The first one I did can be seen here. I am also trying to use all the lovely polishes Christine from Nails At 2am sent me in our swap. Here it is:


The yellow I used is Ulta3- Honolulu. I used 3 coats. It was a streaky mess! I guess that is why I don't have too many yellows. Then I did 3 different layers of the orange which is Loreal- Mango Mama (Miss Candy Collection 2013). It is a jelly polish from their super limited edition jelly collection from earlier this year. It was really easy to work with for what I used it for.

Lastly, to hide all the imperfections from the jelly gradient, I topped it off with Ulta3- Over The Rainbow. A perfect mix of large, medium, and small rainbow glitters. Glitter pay off was amazing, too. My only complaint about the Ulta3 polishes is the awful smell. They smell like 100x stronger then regular polishes. There must be some bad chemical in them or something.

Enjoy!

Thursday, August 1, 2013

Spongeless Gradient Nail Art

One of my favorite types of nail art is glitter gradients, but I still haven't mastered sponging normal polishes to a nice gradient. I saw this spongeless gradient using a jelly polish on Chalkboard Nails and knew I had to try it! I even took her advice by topping it with the same glitter:


It was definitely a success!

I started off with two coats of Color Club- Sunrise Canyon (Fiesta Collection Spring 2013), which is just a standard creme polish. Then doing what Reccca Likes Nails showed in her tutorial, I just used the brush from the bottle of a jelly polish to gradually create the gradient. The jelly I chose was China Glaze- Keepin' It Teal (Sunsational Collection Summer 2013). I added about 4 coats of that total, with the most toward the tips. Lastly, I topped it off with Maybelline Color Show- Clearly Spotted to hide any imperfections.

I must say, it looks uhmayzing! Although it was kind of time consuming compared to doing it all at once using a sponge. I am a little slower doing my nails anyways. It was kind of frustrating to get the technique down, that is what the non photo hand is for! Even after I felt I was done, I didn't like it because it didn't look smooth enough for my taste, but once you add that glitter topper, bam! It all came together!

I will definitely be doing more of these!